The Bottom N node is used to filter a given table by the bottom n number of rows. The Bottom N node must be connected to a Select node or an SQL Query node; you can then specify the number of bottom rows to be returned in the resulting table. For other filter types, use the Filter node from the Preparation functions.
Configure the Bottom N Node
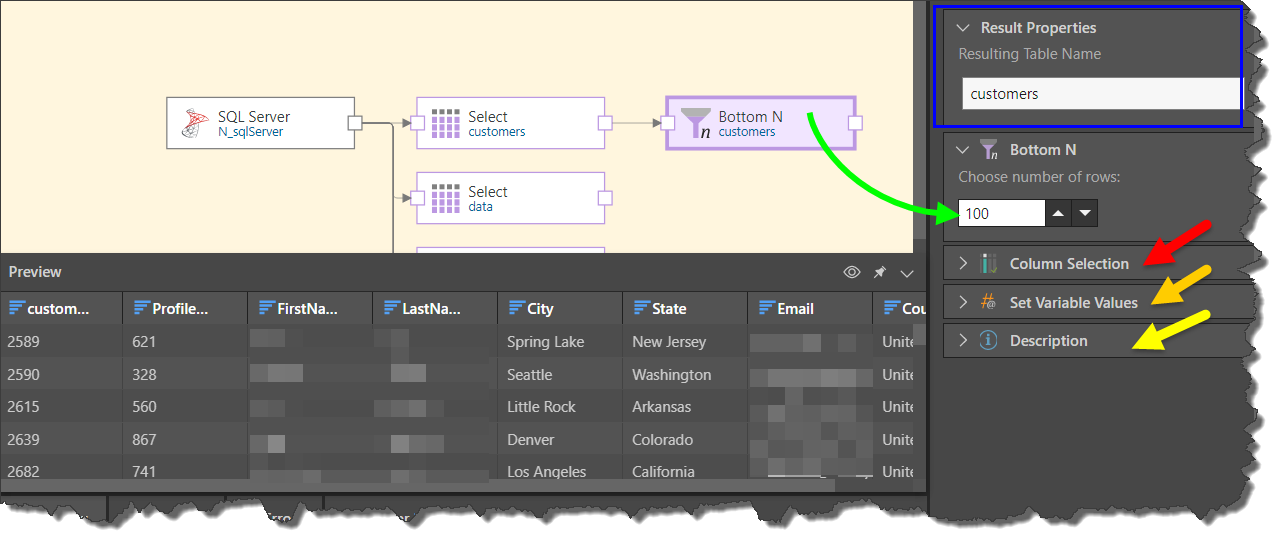
Connect the Bottom N node to a Select or SQL Query node; from the Properties panel enter the number of bottom rows to be returned in the resulting table (green arrow below). You can rename the table (blue highlight), determine which columns to include in the table (red arrow), set incremental loading (orange arrow), and add a description to the node (yellow arrow).
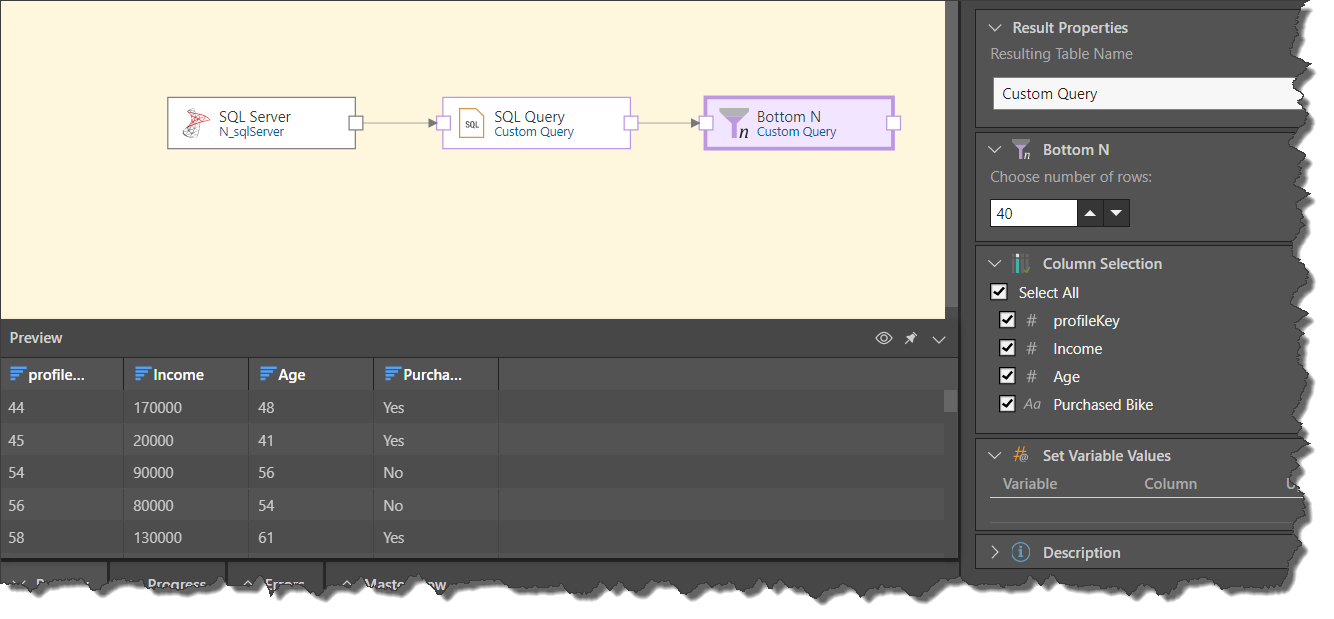
Here the Bottom N node was connected to an SQL Query node to return the bottom 40 rows in the table returned by the SQL query:
Preview Result Set
The result set of Bottom N node can be previewed by clicking on the node, and then clicking the preview icon from the node's Properties panel, or from the Preview panel. By default, the preview is limited to the first 50 rows, but this can be changed from the Preview Size dropdown list in the ribbon.
- Click here to learn more about the Preview panel.
Column Selection
Expand the Column Selection panel to update the column selection for the given table. By default, all columns in the table are selected. You can, however, remove columns by clearing their checkboxes. Columns that are not selected will not be copied to the new data model.
Variables
Expand the Set Variable Values window to pass a variable to the node. To do this, click the plus sign and then select the relevant variable, the aggregation type, and the relevant column.
Description
Expand the Description window to add your own description to the node's properties. This is useful for keeping track of the ETL process, especially if multiple users are working with the same ETL.